How to Build a Carpenter Bee Trap
Link to instructional video here: Carpenter Bee Trap ConstructionGather a wooden post along with a few other supplies, then make tunnels for the bees to enter the trap. Install a Mason jar or another transparent object to hold the bees. Then, check back every day to check and empty the trap
Part 1= Cutting the wooden post, Part 2= Drilling the Bee Tunnels, Part 3 = Installing the Trap Jar- Put on eye goggles and a dust mask before working on the trap.
- Whenever you plan on cutting or drilling wood for the trap, cover up to avoid sawdust and wood shards.
- Keep other people out of the areas while you work. Consider also working outdoors or ventilating your workspace by opening nearby doors and windows.
- Wear a short-sleeved shirt so you don’t have to worry about loose fabric getting caught in your tools. Also, don’t wear jewelry and tie back your hair if it is long.
Step 2: Measure and mark a diagonal angle at the top of the post. Measure about 7 in (18 cm) up along one side of the post. Make another mark about 4 in (10 cm) up the opposite side of the post. Use a ruler to draw a diagonal line connecting the points. The line will be at about a 45-degree angle and is used to cut the top part of the trap.
Step 3: Use a saw to trim the post along the traced line. Hold the post still again. To make the cutting process easier if you’re using a handsaw, pin it to a workbench or sawhorse with a bench clamp. If you’re using a circular saw, hold the wood so the saw slices across the line you made. This will leave the post with an angled top you can use to hang the trap later.
Step 4: Drill through the bottom of the post using a 7⁄8 in (2.2 cm) bit. Flip the post over so the flat, bottom edge faces upward. Position the drill bit directly over the center of the post. Carefully drill straight down, creating a hole about 4 in (10 cm) deep. (You can measure your drill bit ahead of time to ensure the hole is the correct length. If the drill bit is too long, mark it with tape so you know when to stop drilling.)
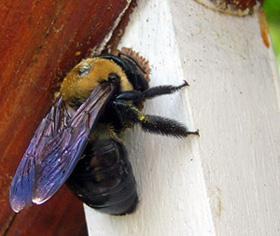
Step 5: Mark entry holes 2 in (5.1 cm) up the sides of the post. Measure up from the bottom edge of the post on one side. The holes also need to be about 3⁄4 in (1.9 cm) from the sides of the post in order to keep your trap sturdy. Mark the spot in pencil, then repeat the process on the other 3 sides. (Make sure the marks are well-positioned before you start drilling These will be the entrance points for the bees, so if they aren’t in the right spot, they won’t connect.)
Step 6: Position a 1⁄2 in (1.3 cm) drill bit diagonally on the mark. Lay the post flat and start with one of the marks you made on the sides of the trap. Point the drill bit up toward the top of the trap at a 45-degree angle. If you angle the drill properly, the new holes will end up connecting to the center tunnel, giving the bees nowhere to go but down. (The tunnels have to be angled upward in order to prevent light from getting into the trap. It causes the bees to head toward the clear jar placed at the bottom of the trap.)
Step 7: Twist the lid off of a Mason jar. A half-pint jar has a lid about 2.8 in (7.1 cm) wide, the perfect size for your trap. Turn the metal ring on top of the jar counterclockwise by hand to free the lid. The lid is the flat piece of metal inside the ring. Pick up the lid and set it aside.
Step 8: Screw the lid to the underside of the trap. Place the lid back inside the Mason jar’s ring. Then, position the ring over the hole on the bottom edge of the wood post. Fit a pair of 1⁄2 in (1.3 cm) wood screws into the smaller holes you punched through the lid. Finish securing the lid by using a screwdriver to turn the screws clockwise.
Step 9: Make a pilot hole through the trap’s top if you plan on hanging it. You will need a wood drill bit approximately 1⁄8 in (0.32 cm) in size. Flip the trap over so the Mason jar side is facedown. Position your drill bit along the center of the trap, then drill down into it. This hole only needs to be short so it doesn’t reach the bee tunnels you made earlier.
Step 10: Twist an eye screw into the hole to hang the trap. Use a screw the same length as the hole you made. Set the screw end in the hole, then turn it clockwise until it feels tight and sturdy. You can then hang the trap by threading a rope or a hanging hook through the screw’s eye. Find space for the trap near your deck or other spots carpenter bees tend to invade.